The entire process of exporting data from Idealpos and importing data into Phototicket consists of three steps/sections which are outlined as follows:
Prepare the Map File - Create a map file for Phototicket.
Automatic Exporting - Configure Idealpos to export the required data that will be used by Phototicket.
Automatic Importing - Configure Phototicket to import the data which is exported by Idealpos.
Phototicket uses a map file to map fields from an Idealpos export.
A map file is a comma separated values file consisting of two columns.
The first column contains a field name exported by Idealpos and the second column contains the matching field name imported by Phototicket.
The first row specifies the fields that will be used as the unique identifier for each product.
The field names that Phototicket can import are:
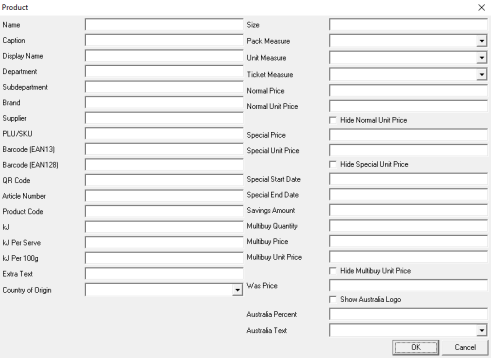
The field names closely match the names in the Phototicket Product form:
Note that the Phototicket Display Name is set to the same value as Name when a product is first imported. On subsequent imports, the Display Name is only updated if the Update Display Name flag is set. This allows store staff to improve the product name for display on tickets, changing pkt to packet, for example, and not having those improvements overwritten on subsequent imports.
An example map file might look like this:
SCAN,barcode
CODE,plu_sku
DESC,name
DESC2,extra_text
PRICE1,normal_price
Note!
The filename and folder location for the map file should be C:\Users\Public\Documents\DPI\Map.csv (this is configured later in the Automatic Importing step outlined further below).
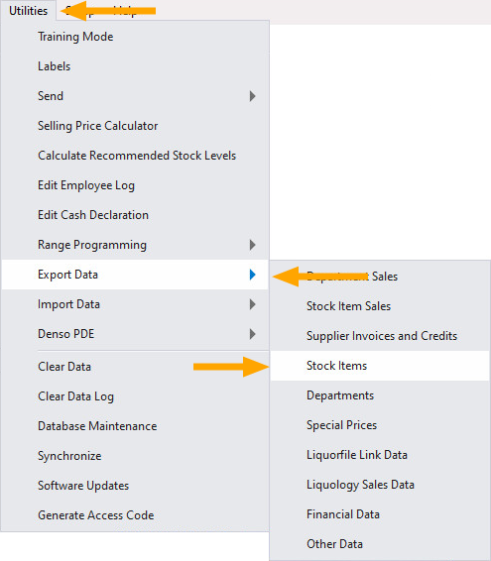
In Idealpos from the main menu, select Utilities > Export Data > Stock Items.
In the Export Stock Items window, configure the settings as follows:
Set Export to "Automatic Export Format"
Select the required Export Specific Fields by Range values.
Enable the "Include Headers" checkbox.
Press the "Save Format" button.

In Idealpos from the main menu, select Setup > POS Terminals.
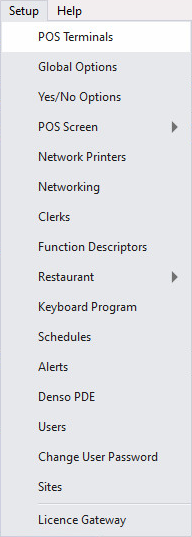
In the POS Terminals window, select a POS Terminal, click the Modify button.
![]()
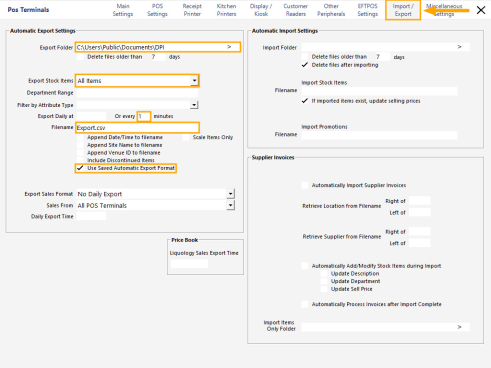
In the POS Terminals window, select the Import/Export tab.
In the Automatic Export Settings, configure the following settings:
Export Folder - C:\Users\Public\Documents\DPI
Export Stock Items - All Items
Or every X minutes - 1
Filename - Export.csv
Use Saved Automatic Export Format - Enable checkbox
Close the window to save the settings.
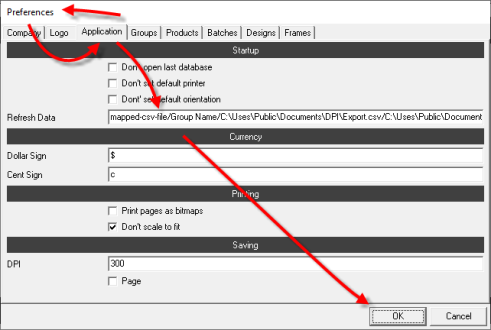
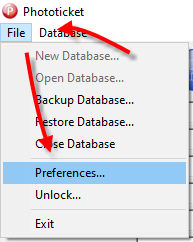
In Phototicket, from the main menu, select File > Preferences...
In the Preferences form, select the Application tab.
In the Startup section, perform the following configuration:
Set Refresh Data to mapped-csv-file/Group Name/C:\Users\Public\Documents\DPI\Export.csv/C:\Users\Public\Documents\DPI\Map.csv/dmy/true (where Group Name is the case sensitive name of an existing group, dmy is the date format, which could also be ymd and true instructs Phototicket to update the product Display Name when the product Name is updated).
Click the OK button.